|
Power Window Fix
Ever roll down your window on a cold morning only to have the glass list to one side and fall in to the door? If so, then the little nylon sliders that attach the glass frame to the window regulator came apart or the window glass pushed its way out of the glass channels. Either way it means you're going to be pulling off the door panel to fix it.
The procedure below is shown on a 318ti. Other E36 models are very similar, but the door panels are slighty different.
You will need the following parts/tools:
- T-20 Torx Screwdriver
- Panel Puller Tool / Butter Knife
- Small Flat Blade Screwdriver
- Needle Nose Pliers
- Small Screwdriver
- 13mm socket
- White Lithium Grease
- 2x BMW Sliding Clip #51 32 1 938 884
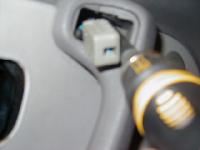
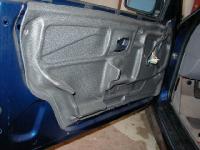
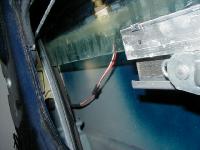
Push the door handle trim ring forward to remove it. Remove the torx screw located deep inside the hole at the bottom of the door pull handle. Use a small screwdriver to carfully pry out the power mirror control switch (driverside) or the blank (passenger side) and remove the torx screw located behind it. Use your panel puller tool between the door panel and the bottom edge of the door to start popping loose the plastic push pins that attach the panel to the door. Once you get a few of the pins loose, reach behind the panel and pull the panel away from the door to release all the pins. Slide the door panel up to detach it from the inner window seal. Disconnect the speaker wires and set the door panel aside. Carefully peel the foam splash shield off of the door.
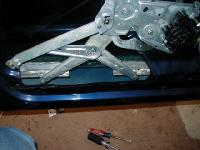
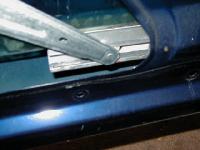
Slide the door glass up and pull it halfway up out of the door. Check to make sure that the glass is sitting in the front and rear glass channels. If it is not, tilt the front edge of the glass down in to the door to get the front and rear properly seated in to the channels. You should be able to push the door glass up and down smoothly. Remove the metal retainer pins from the nylon slider clips, pop the clips off of the window regulators and/or slide them out of the glass frame. Use the power window switch to lower the regulator position to almost the lowest postion.
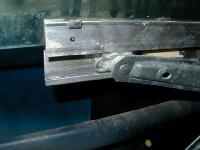
Remove the steel retainer pins from the new clips. Grease up the glass frame and slide the clips in to position in the frame. Slide the glass down and pop the regulator arms in to the new clips. Insert the pins in to the clips using needle nose pliers. You may need to raise or lower the window slightly to access the clips more easily. Run the window up and down a few times to make sure it is opperating smoothly.
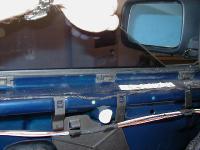
You may need to adjust the tilt angle of the glass. To adjust, use a 13m socket to loosen the bolt that attaches the arm from the window regulator to the back edge of the door. To tilt the glass forward, pull the arm up, to tilt the glass backwards, push the arm down. It's best to check the fit at top rear corner of the glass. Once you have the glass adjusted, tighten the bolt.
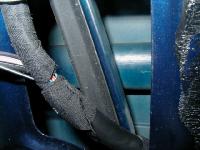
Reinstall the splash shield, pushing it in to place around the edge to glue it back in to place. Plug the speaker wires back in to the speakers, feed the mirror wire back through the door panel, hook the top edge of the panel back over the inner window seal. Line up the push pins on the backside of the door panel with the holes in the door and push the door panel back in to place. Reinstall the torx screws (the longer one goes in the top hole), reinstall the mirror switch/blank, Slide the door handle trim ring back in to place. Sit back and enjoy your now functional window!
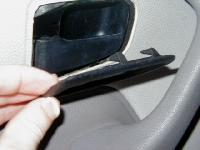
Door Handle Trim Ring |
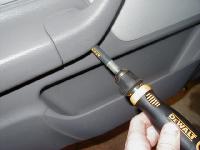
Lower Torx Screw |

Pry Out Mirror Switch |
Upper Torx Screw |
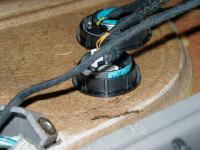
Speaker Wires |
Splash Shield |
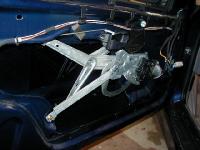
Window Regulator |

Remove Retainer Pins |
Tilt Glass Foward To Reseat In to Channels |
Front Glass Channel |
Rear Glass Channel |
Regulator Lowered / Clips In Place |
Pop Regulator Arms In To Clips |
Reinstall Retainer Pins |
|

|